
what if I told you that you can now perform all the tasks of your business in a single application?
Marketing, sales, operations, contracts, etc. Well, this is possible thanks to unique tools like Zapier. This platform allows you to connect different apps and productivity services together to create a smarter workflow and save you a lot of time in the daily tasks of your business.
Forget about juggling your daily apps and discover, in this post, how to connect two tools with Zapier and automate your processes.
Zapier: what it is and how it works
Zapier is an online tool that allows you to link different web applications, transfer data and automate processes by automatically linking and synchronising the actions of most of the applications and software you use in your company, so that recurring processes can be executed automatically.
Let's look at an example use case:
- If you have a blog hosted on HubSpot, you can create a sequence of actions (or zaps, as we will see later) so that every time you publish a new post, it is automatically shared on Facebook, LinkedIn, Twitter or other social networks.
This example can be applied to a wide variety of applications because, as mentioned above, Zapier connects a large number of applications and services with each other. This connection is possible thanks to the so-called "Zaps", which are automated workflows between web applications that link two or more applications with each other.
The idea behind this automation tool is to help you create a smarter and more personalised workflow. This way, you can save time and focus on the important parts of your work. And since everyone has different apps or services that they use throughout their working day, Zapier offers integration with a lot of different destinations. If you wonder if your favourite app is among them, take a look at all the apps Zapier integrates with.
Key terms for using Zapier
Zapier's web interface is used to create commands called zaps. Each zap is composed of two main parts: a trigger and an action.
The trigger is the event that sets the zap in motion; in programming jargon, it can be thought of as the "if this happens..." part of the operation. Zapier works with over 2,000 applications and services, so there are countless triggers on which you can base a zap.
The action is the event that completes the zap. It's the "then do this" part of the command and automation that simplifies your task or workflow. For example, a zap can be written to create an event in Google Calendar based on each new Trello card added to your dashboard, or a zap can create a to-do list in an app like Todoist based on emails you highlight or check off in Gmail.
When a zap runs, it processes a piece of data. Each time that happens, it counts as a task. Tasks are tasks monitored by the platform for each of the actions. More generally, an action in Zapier is a task that is executed by the trigger and then automatically executed by the software to complete the assigned job.
How to connect two tools in Zapier
To integrate two or more applications in Zapier and automate processes, a zap must be created first. This zap can be created in two ways: through a template or from scratch depending on the needs of each one.
In this case, for more customisation, we are going to create a zap from scratch. Once logged into Zapier, you will need to click on the plus (+) button in the top left corner of the navigation menu.
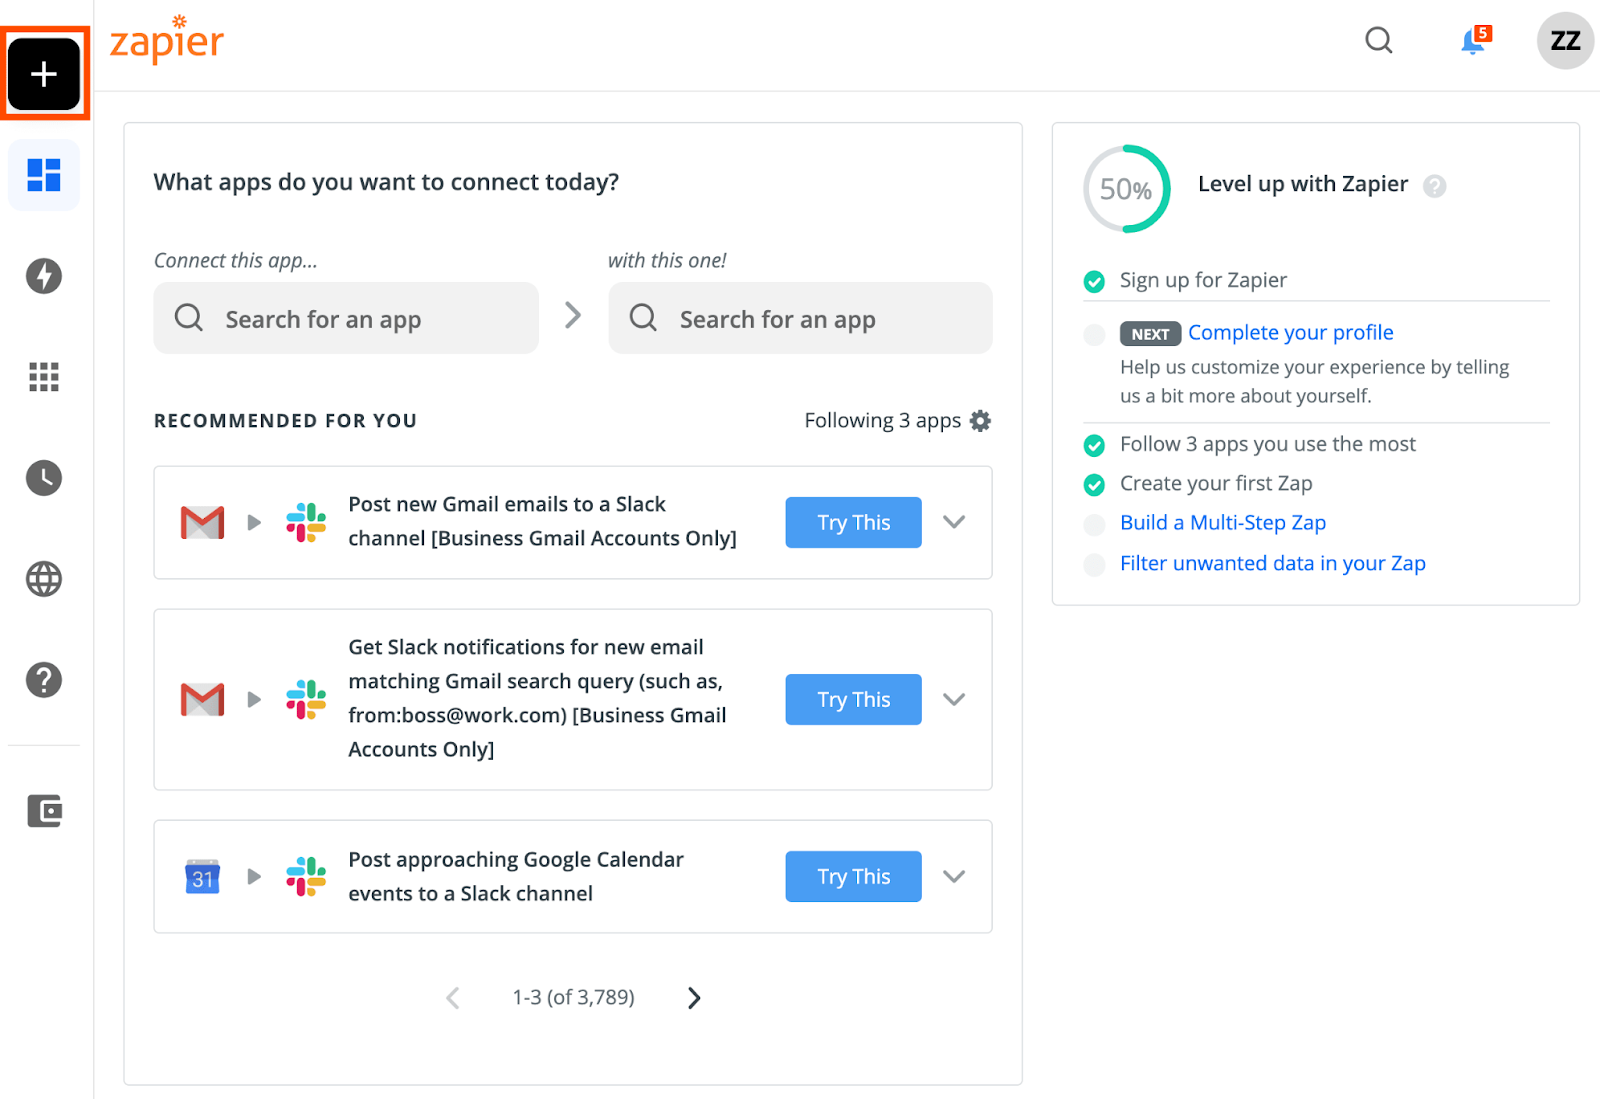
This will take you to the Zap editor, where you can configure the trigger and action of your zap.
-
Configuring the trigger
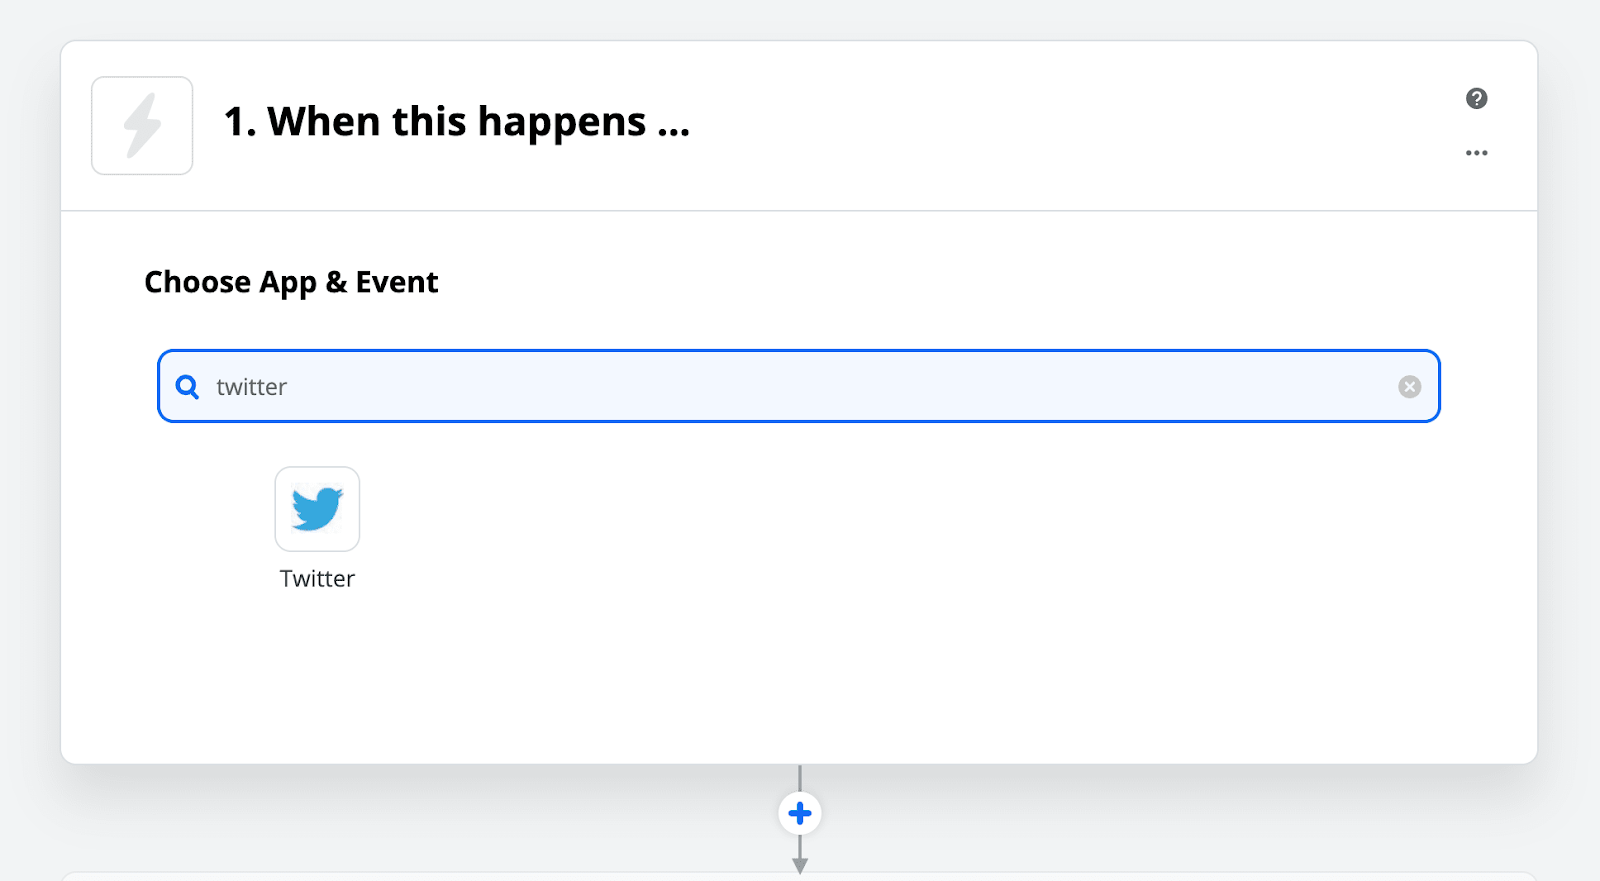
Step 1 .First, select the trigger app, i.e. the app you want to start the Zap with. Enter the name of the app in the search box or, if you have already connected apps to Zapier, click on the app icon shown below. In this case we will use Twitter as our trigger app.
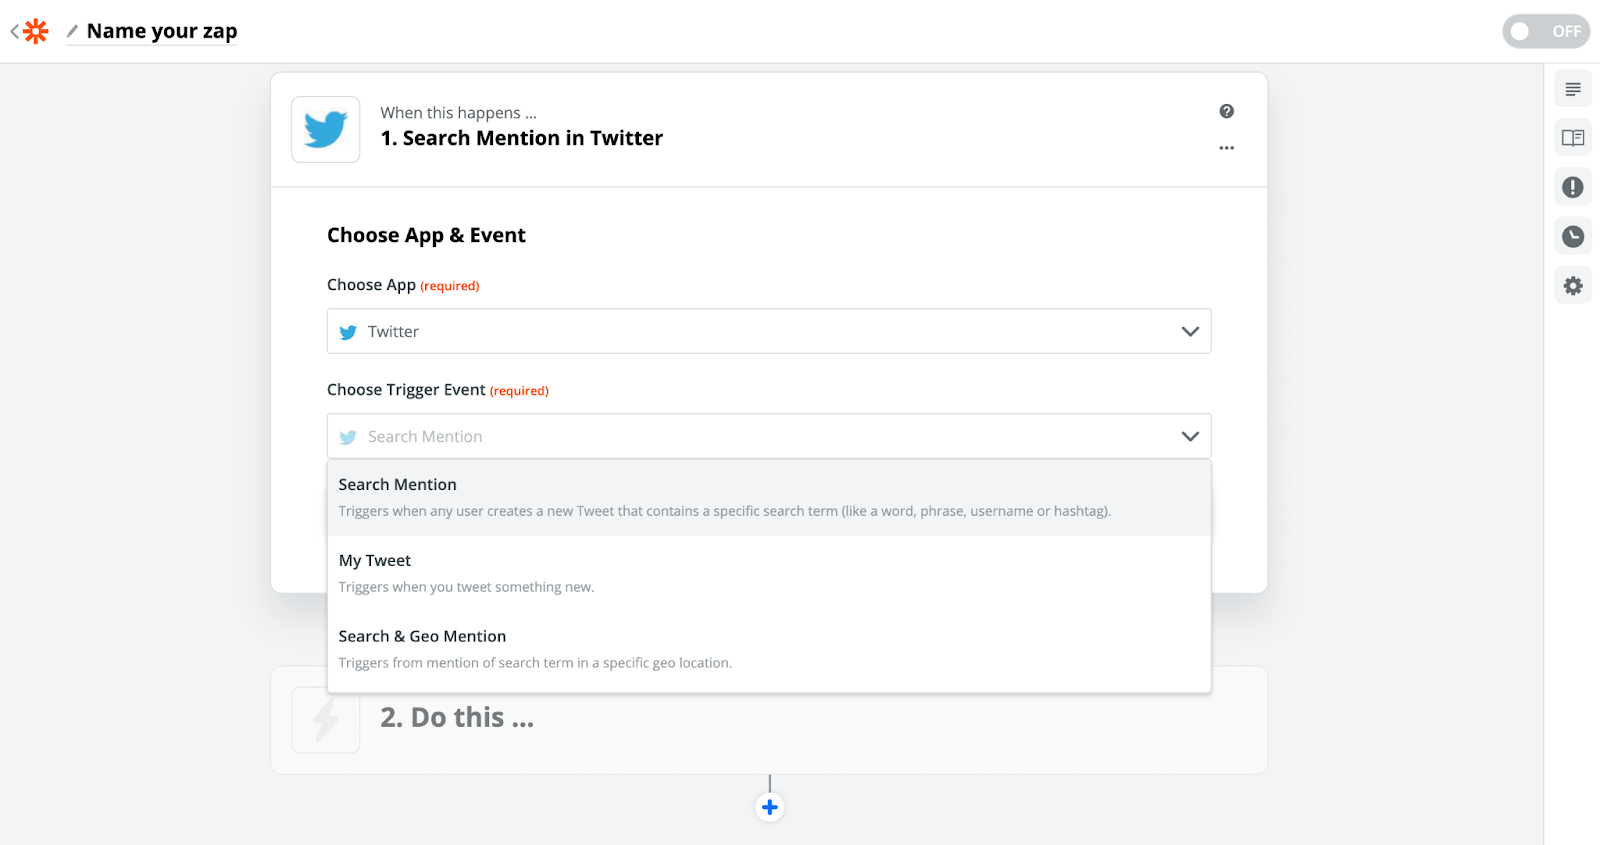
Step 2. Select the specific trigger for the app from the list of options. Examples of triggers might include events such as "new email received", "document updated" or "spreadsheet modified".
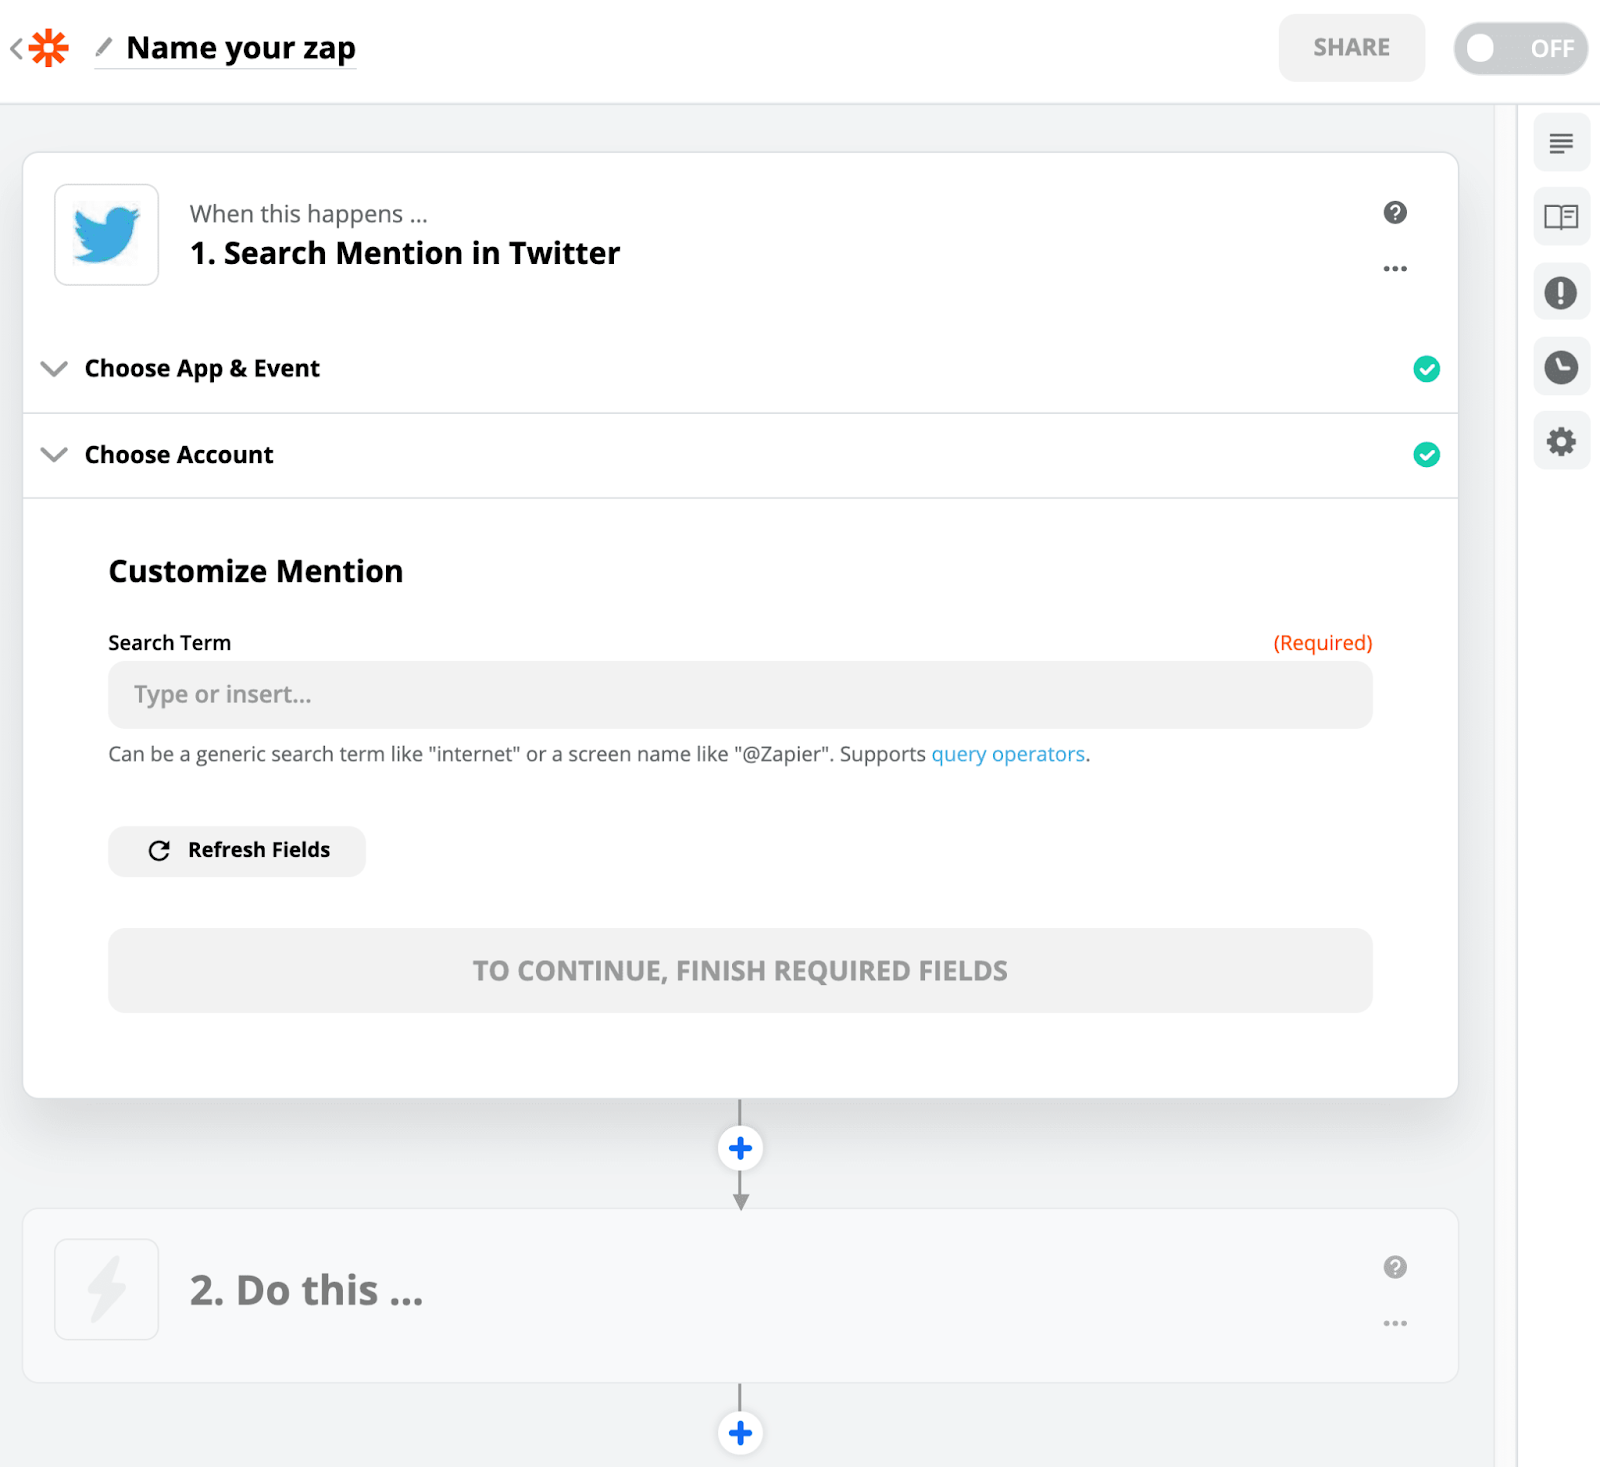
We will choose "Search for mentions" in order to find any new mentions for a given search term.
Then click Continue.
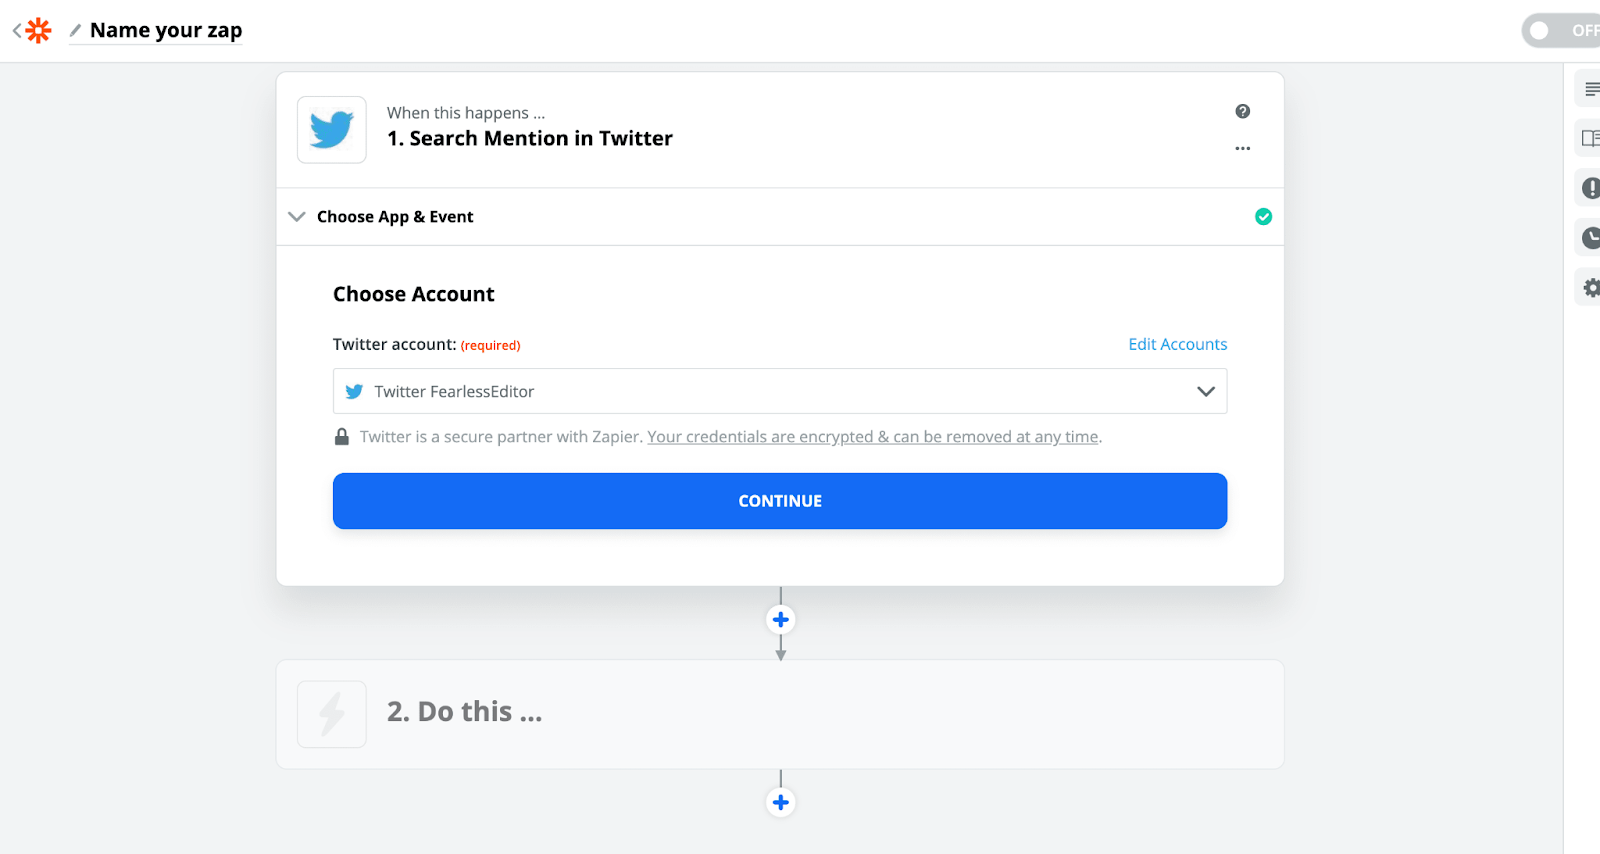
Step 3. You must now connect or select your account. Choose an existing Zapier account or click the Sign in button to add a new account. A pop-up window will appear asking you to authorise Zapier to connect to the application. Click the Continue button.
Step 4. If there are any application fields or other options you want or need to include in the Zap, you can configure them here. For example, you can provide the Gmail label, spreadsheet or Dropbox folder needed for the Zap to work properly. In this example, we enter the Twitter search term we want to monitor. After that, click Continue.
Step 5. To continue, you need to make sure that everything works correctly by running a test. In the test, you will see what information from the application will be used for the trigger. Click Test and continue to make sure that the trigger works. Before continuing to the next step, you will need to wait for the success message to appear.
-
Prepare the action
Now it's time to tell Zap exactly what you want it to do.
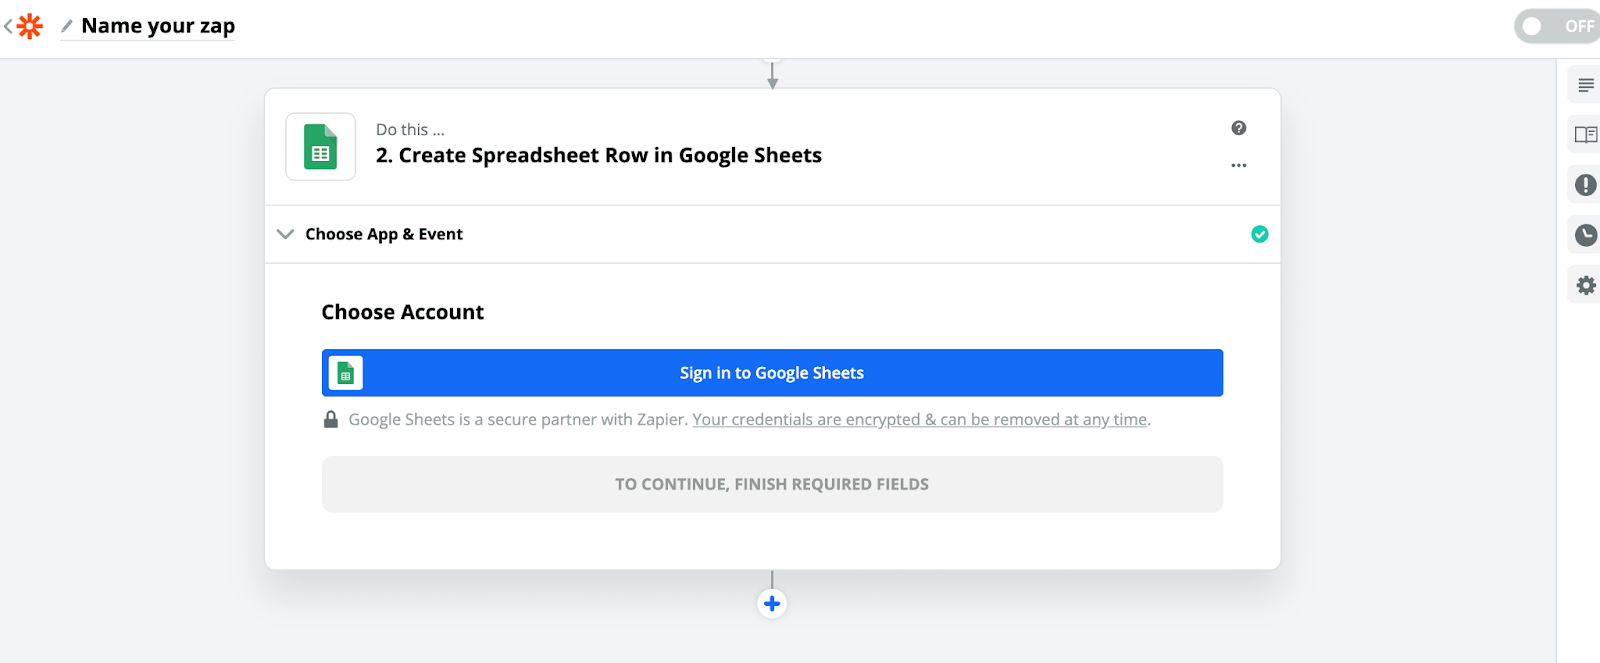
First, select the application you want to apply the action to by entering its name in the search box. It can be the same application as your trigger application or a different one. In this example, we will use Google Sheets.

Next, you need to specify how you want the application to respond to the trigger. Examples of actions could be updating a calendar event or sending an email.
In this example, we will create a calculation line, then click Continue.

Step 3. Now you need to connect or select your account. Choose an existing Zapier account or click the Sign in button to add a new account. A pop-up window will appear asking you to authorise Zapier to connect to the application. After that, click Continue.
Step 4. You are now on the page where you can customise your Zap. In this step, you can tell Zap exactly what you want it to do with the activation request data by filling in the blank fields.
Use the non-editable menu in each field to notify the Zap that you want to get information about the activation process.
When you click on the non-editable menu, a list of your activation application data will appear. You will most likely want to select the data points from your activation application that most closely match your action application field.
Some fields are mandatory - for example, if you want to update Google Sheets, you must first select which spreadsheet and workbook you want to update.
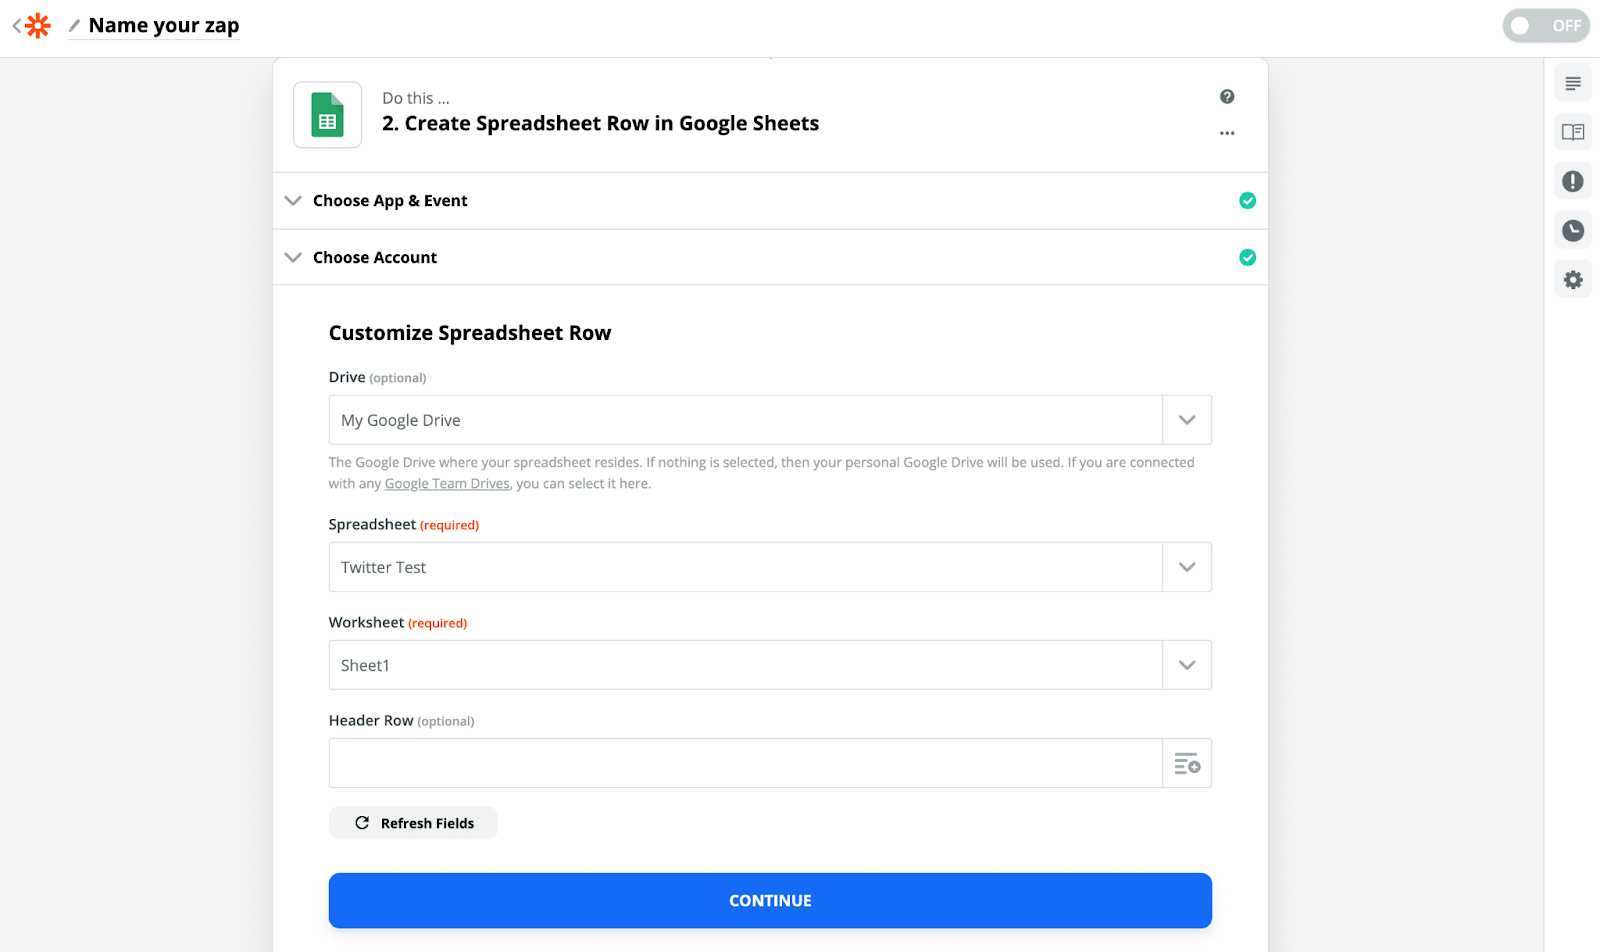
Other fields are optional, but often need to be filled in. In this example, in the "Handle" field of the Spreadsheet, we will choose the Twitter Username. As a result, Zap will enter the correct Twitter username in the "Identifier" column of the Spreadsheet. Similarly, we will align the tweet text column in Google Sheets with the Twitter text field.
zzz
In certain fields, you can enter the information directly, rather than selecting it from a drop-down menu or using the plus symbol (+). For example, in an email field, simply enter an email address.
Once you have chosen your options, click continue.
Step 5: Now let's test the action. You will see what information the activation application will send to the action application. Click the Create and continue button to make sure this step works as expected.
Step 6: Finally, click the Finish editing button. Make sure you give your Zap a name by clicking on the sign in the top right corner of the editor. Then, in the bottom right corner of the page, toggle the on/off button.
your Zap will run automatically from now on until you cancel it.

You can return to your Zap at any time to adjust steps or change specific details. You will find all your Zaps on your Zaps page.